Transform Your Kitchen With Freestanding Cabinets Interior Films
April 18, 2025Practical Benefits of Freestanding Cabinets Interior Films
- Cost-effective kitchen makeover: Instead of replacing an entire cabinet set, you can achieve a complete makeover for a fraction of the price by using interior film for furniture. For example, wrapping a set of freestanding cabinets with interior film can be as much as 70% more cost-effective than buying new.
- Simple application: Kitchen vinyl wraps are also easy to use. Even if you’ve never tackled a DIY project before, you can follow instructions to install the film with minimum mess. The adhesive backing is pressure-sensitive to allow repeated repositioning upon application.
- Low maintenance: A damp microfiber cloth and mild soap are all you need to keep your wrapped cabinets looking pristine. Because the vinyl wrap creates a sealed surface, they are cleaner also due to being less likely to collect grease than painted or porous finishes.
- Rental-friendly: The ability to upgrade without having to commit to doing so in the long term is a huge perk for renters. Many interior films can be removed without damaging the underlying surface. This means you can upgrade your space without breaking your lease agreement. And when it’s time to move, you can restore the cabinets to their original finish.
- Personalization: There are hundreds of colors, finishes, and textures in interior films. It is simple to experiment with trends since you don’t have to worry about them being permanent. You can even combine them to achieve a kitchen look that is all about you.
How To Apply Kitchen Cabinet Wrap to Freestanding Units
- Prepare your cabinet’s surface: Clean grease, dust, or residue off your cabinet’s surface. When cleaning, use degreasing cleaner to promote good adhesion.
- Take careful measurements: Precision is important. Measure each panel and mark recesses or edges. Don’t forget to include extra centimeters to have room to manoeuvre.
- Peel and stick: Begin with one corner. Apply the film while working your way along, smoothing out air bubbles along with you with a squeegee or a credit card wrapped in cloth.
- Trim off edges: Use a sharp precision tool or utility knife for a perfect edge. Use heat from a hairdryer to soften film over curves and corners.
- Finish with finesse: Once applied, inspect your work. Minor air bubbles can be pricked with a pin and smoothed out gentl The process of adding decorative vinyl for cabinets can usually be completed in a day, depending on the number of cabinets and your pace. It’s a satisfying weekend project that delivers immediate visual payoff.
Inspiring Kitchen Transformation Ideas
- Scandi-style refresh: Use matte white or light oak films for a clean, minimal look that reflects natural light beautifully.
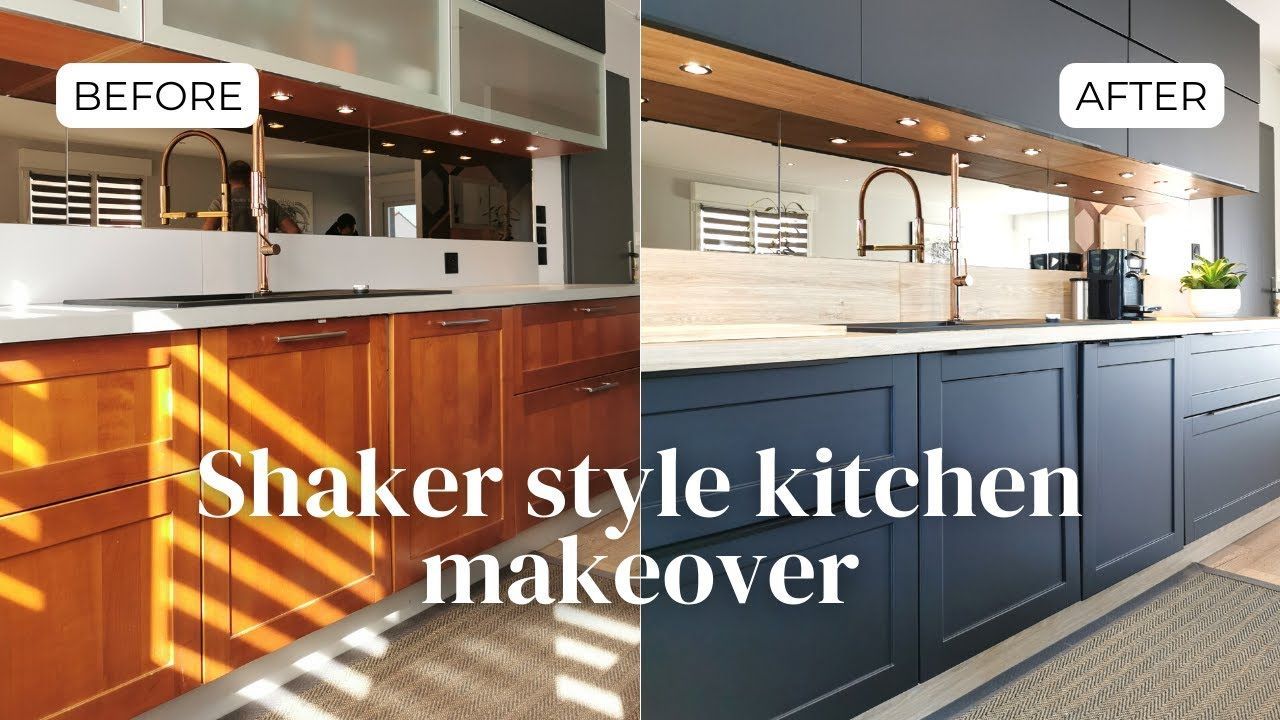
- Bold accents: Wrap a single freestanding cabinet in navy blue or emerald green for a statement piece that draws the eye.
- Industrial edge: Try concrete-look films for a modern, urban touch that pairs well with metal accessories.
- Vintage charm: Use pastel-colored vinyl or retro patterns to give your kitchen a nostalgic flair.
- Mix and match: Combine complementary textures for a designer effect, like marble for base units and wood grain for upper cabinets.
Pairing With Other Kitchen Upgrades
- Replace cabinet handles or knobs with matte black, brass, or brushed nickel options
- Add peel-and-stick backsplash tiles for a splash of color or texture
- Update lighting fixtures with modern pendant lights or under-cabinet LEDs
- Introduce open shelving for style and function, ideal for displaying ceramics or small plants
- Install a new kitchen rug or runner to add warmth and comfort underfoot
Ideal for Any Living Situation
Whether you’re in your forever home or a temporary rental, freestanding cabinet interior films adapt to your needs. Homeowners can use them for seasonal updates or to test a style before committing to permanent changes. Even renters can enjoy a stylish kitchen without violating lease agreements. Interior films also offer a fantastic solution for mobile homes, holiday lets, or even office kitchenettes where design updates are often overlooked. Their lightweight application and versatile finish options make them suitable for virtually any environment. With Cover Styl, your dream kitchen could be just a film away.